

How to Sign a Document in Mac Preview
By Adriana Linares
Signing a form used to be a pretty simple process: Someone handed you a piece of paper and, if you were lucky, a pen. You scrawled your John Hancock across the paper and handed it back, and the job was done. Funny how technology has made things both easier and more complicated all at once, right?
Legal professionals send or receive document that need signing every single day. The easy and yet most complex way to handle this is to print it out, sign it, scan it back in, and then email or file it. For Mac owners, there is a simple way to do it right on your computer – and it doesn’t even involve buying any extra software.
Apple’s built-in Preview app is an often-underappreciated tool, and among its many uses is the ability to sign a PDF form without ever needing to print it out.
Preview is available on every Mac OS since Lion, so if you have a Mac, you almost certainly have Preview. Simply look for it in the Applications folder or use the CMD + Spacebar shortcut to search for it.
Next, open the PDF form you need to sign in Preview.
- Open the Markup toolbar (if it’s not already showing) by clicking the pen icon.

- Click the icon that looks like a signature on a line. Assuming you don’t already have a signature created, you’ll see three options for creating a signature. If you do already have one saved but want to make a new one, click “Manage Signature.” Then choose from one of the three options:
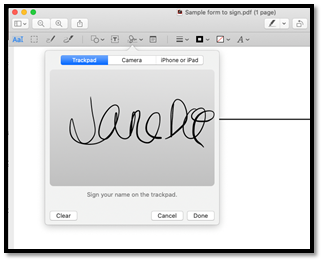
Trackpad. Choose the “trackpad” option and then click the button that says “Click here to begin.” Simply draw your name on the trackpad and click “Done” when finished. This can be trickier than it sounds, so don’t be afraid to hit “Clear” and start over until you have a signature you’re happy with.
Macs with Force Touch trackpads allow you to press harder on the trackpad to create a darker line.
- The computer’s built-in camera. Choose the “camera” option. The computer’s camera will automatically turn on – you’ll probably see your own smiling face. Sign your name clearly on a piece of plain white paper – there shouldn’t be lines or other patterns on the paper, because those will become part of the stored image.
Hold the piece of paper up to the camera until it’s centered in the box, with the signature resting on the blue line that appears. Then click “Done.” As with the trackpad method, you can hit “Clear” and start over until you have a signature you’re happy with.
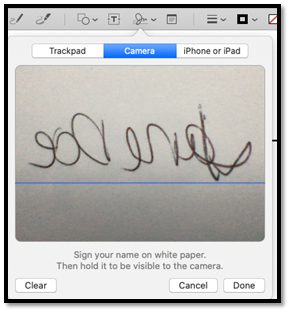
Note that the signature will appear inverted when you hold it up to the camera. That’s OK. Just make sure it sits straight on the line, and Preview will ensure the signature appears in the right direction once it’s saved.
- iPhone or iPad. You’ll need a device connected to your computer by Bluetooth and physically with you. Choose the “iPhone or iPad” option and select the device you want to use.
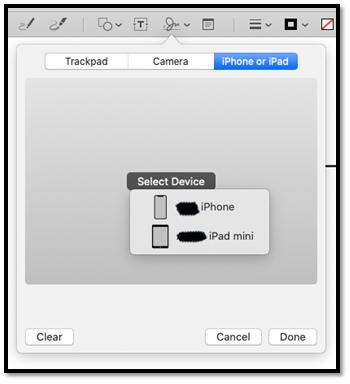
A screen will pop up on that device asking for your signature.
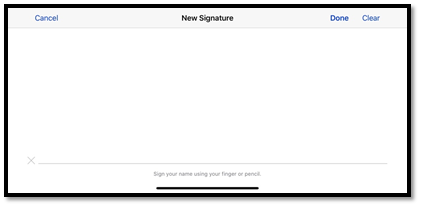
- Sign with your finger or Apple Pencil. As you sign, you’ll see the signature appear on the computer screen. Click “Done” when you’re happy with the final.
Note: Make sure your phone or iPad is already unlocked and hold it horizontally. It’s easy to hit the wrong place and need to start over.
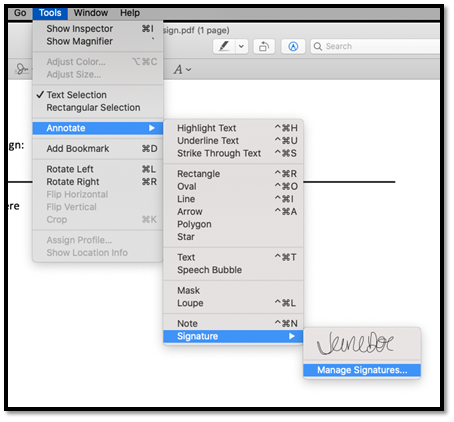
- Now you have a signature saved and ready to enter into your document. Open the form and click the signature icon. Note: You can also get to this menu by clicking Tools > Annotate > Signature
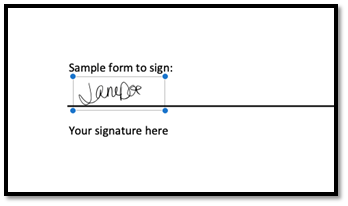
- Click the signature. It will be placed into your document. You can move it around or resize it as needed.
- Then save the document. That’s all there is to it.
Note that you can create a signature in Preview without having the form open. You can save a signature using the steps above and save it, then place it in the document whenever you’re ready.
You can also delete a signature at any time by clicking the X next to it in the Manage Signatures window.
The next time someone sends you a document, there’s no need to drag out the printer. Now signing a PDF is as simple as clicking a button!